Mar 24, 2022
Istio is a service mesh that transparently adds various capabilities
like observability, traffic management and security to your
distributed collection of microservices. It comes with various
functionalities like circuit breaking, granular traffic routing, mTLS
management, authentication and authorization polices, ability to do
chaos testing etc.
In this post, we will explore on how to do canary deployments of our
application using Istio.
What is Canary Deployment
Using Canary deployment strategy, you release a new version of your
application to a small percentage of the production traffic. And then
you monitor your application and gradually expand its percentage of
the production traffic.
For a canary deployment to be shipped successfully, you need good
monitoring in place. Based on your exact use case, you might want to
check various metrics like performance, user experience or bounce rate.
Pre requisites
This post assumes that following components are already provisioned or
installed:
Kubernetes cluster
Istio
cert-manager: (Optional, required if you want to provision TLS certificates)
Kiali (Optional)
Istio Concepts
For this specific deployment, we will be using three specific features
of Istio's traffic management capabilities:
Virtual Service: Virtual Service describes how traffic flows to
a set of destinations. Using Virtual Service you can configure how
to route the requests to a service within the mesh. It contains a
bunch of routing rules that are evaluated, and then a decision is
made on where to route the incoming request (or even reject if no
routes match).
Gateway: Gateways are used to manage your inbound and outbound
traffic. They allow you to specify the virtual hosts and their
associated ports that needs to be opened for allowing the traffic
into the cluster.
Destination Rule: This is used to configure how a client in
the mesh interacts with your service. It's used for configuring TLS
settings of your sidecar, splitting your service into subsets, load balancing strategy for your clients etc.
For doing canary deployment, destination rule plays a major role as
that's what we will be using to split the service into subset and
route traffic accordingly.
Application deployment
For our canary deployment, we will be using the following version of
the application:
httpbin.org: This will be the version one (v1) of our
application. This is the application that's already deployed, and
your aim is to partially replace it with a newer version of the
application.
websocket app: This will be the version two (v2) of the application that has to be gradually introduced.
Note that in the actual real world, both the applications will share
the same code. For our example, we are just taking two arbitrary
applications to make testing easier.
Our assumption is that we already have version one of our application
deployed. So let's deploy that initially. We will write our usual
Kubernetes resources for it. The deployment manifest for the version
one application:
And let's create a corresponding service for it:
SSL certificate for the application which will use cert-manager:
And the Istio resources for the application:
The above resource define gateway and virtual service. You could see
that we are using TLS here and redirecting HTTP to HTTPS.
We also have to make sure that namespace has istio injection enabled:
I have the above set of k8s resources managed via
kustomize. Let's deploy them to get the initial environment which
consists of only v1 (httpbin) application:
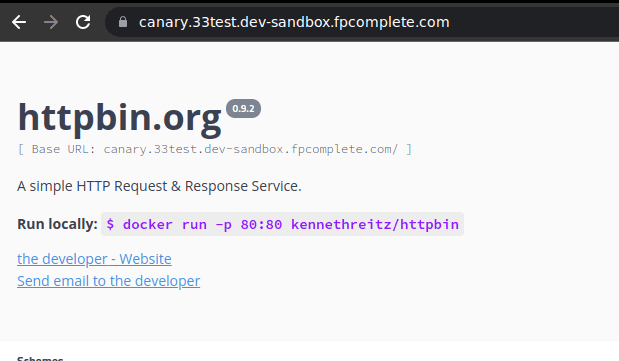
Now I can go and verify in my browser that my application is actually
up and running:

Now comes the interesting part. We have to deploy the version two of
our application and make sure around 20% of our traffic goes to
it. Let's write the deployment manifest for it:
And now the destination rule to split the service:
And finally let's modify the virtual service to split 20% of the
traffic to the newer version:
And now if you go again to the browser and refresh it a number of
times (note that we route only 20% of the traffic to the new
deployment), you will see the new application eventually:

Testing deployment
Let's do around 10 curl requests to our endpoint to see how the
traffic is getting routed:
And you can confirm how out of the 10 requests, 2 requests are routed
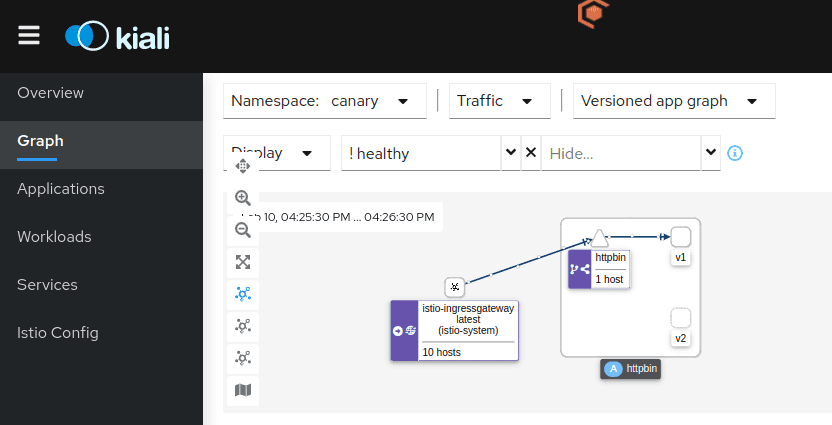
to the websocket (v2) application. If you have Kiali deployed,
you can even visualize the above traffic flow:

And that summarizes our post on how to achieve canary deployment using
Istio. While this post shows a basic example, traffic steering and
routing is one of the core features of Istio and it offers various
ways to configure the routing decisions made by it. You can find more
further details about it in the official docs. You can also use a controller like Argo Rollouts with Istio to perform canary deployments and use additional features like analysis and experiment.
If you're looking for a solid Kubernetes platform, batteries included
with a first class support of Istio, check out Kube360.
If you liked this article, you may also like: